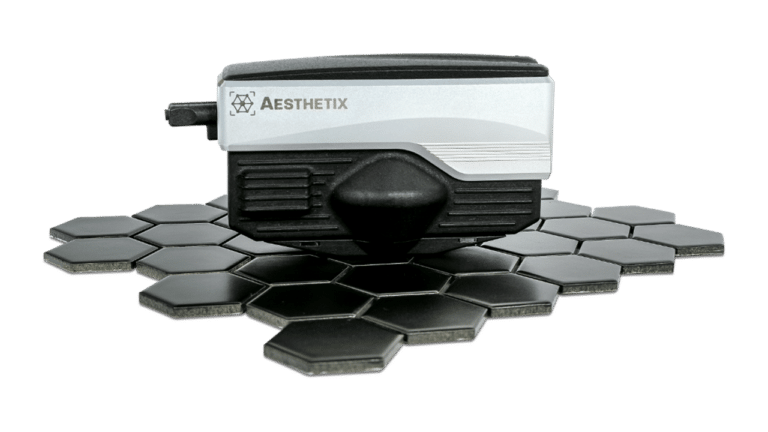
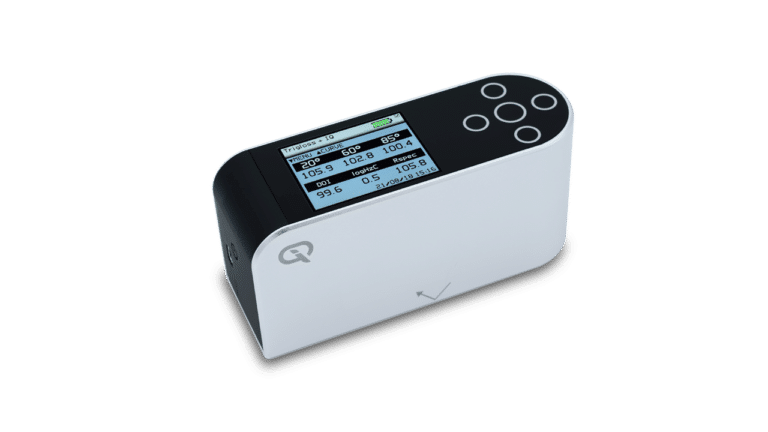
Why buy a Rhopoint IQ, not a gloss meter?
The Rhopoint IQ combines four appearance measuring instruments into one gloss meter size unit.
In a single button push the instrument measures:


Home » Appearance Measurement » Why buy an IQ, not a Glossmeter?
The Rhopoint IQ combines four appearance measuring instruments into one gloss meter size unit.
In a single button push the instrument measures:


For many years a standard gloss meter has been specified and used as a Q.A. tool for quantifying and validating surface appearance quality. It is based on a long established measurement principle, this compares the amount of light transmitted onto a surface with the amount reflected from it at a fixed measurement angle. This produces a value of gloss unique to that surface. This gloss value, however, can often be misleading as it does not define other surface appearance effects that can be seen visually.
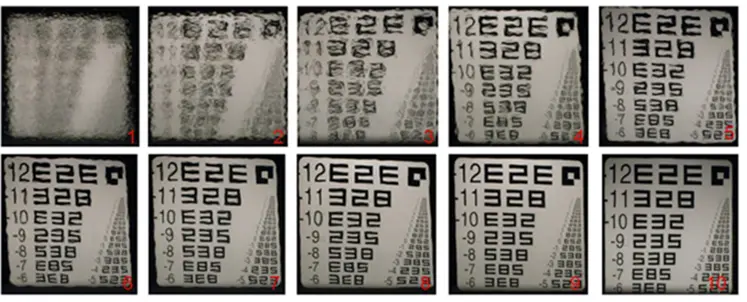
The ten panels above demonstrate this visual difference.
When measured using a standard gloss meter, each of the panels produces the same gloss value however to the eye they appear different.
This visual versus measured discrepancy is due to the texture being present on the surface caused by large (orange peel) and microscopic structures (haze).
Due to the limitations in measurement technology a gloss meter is, therefore, unable to detect these structures as it can only determine gloss values hence why visually the surfaces appear substandard.

Reflectance values for low gloss matt surfaces are too low to be able to determine any differences when observed visually – so predominantly gloss is of importance.
However, as the reflectance value increases towards high gloss the effects of surface texture become more significant, therefore, as defined above, for these surfaces the use of the 20-degree angle is preferred for greater accuracy and resolution.
Gloss is the visual sensation associated with the perceived brightness of direct light reflected from a surface. Surfaces with high reflectance are determined as glossy; less reflective surfaces are semi-gloss or matt.
Gloss meters quantify this effect by measuring the specular light reflection from a surface at an equal but opposite angle of illumination at defined angles.
The Gloss Unit (GU) is defined in international standards including ISO 2813 and ASTM D523. It is determined by the amount of reflected light from a glass standard of known refractive index.
The measurement angles most commonly used for gloss are 20°, 60° and 85°.
The most appropriate angle should be selected dependent on the glossiness of the sample surface.
Using the correct measurement geometry increases resolution and improves the correlation of results with human perception of quality.
To determine the correct measurement angle the surface should be assessed with the 60° geometry-


Law of reflection is the direction of incoming light and the direction of outgoing light reflected make the same angle with respect to the surface.
The standard method for measuring gloss using a gloss meter at 20° requires an acceptance angle of ± 0.9° around the specular angle of 20°.
This narrow angular measurement range of reflected light does not allow the sensor in a gloss meter to detect the texture on a surface as the structures within the texture cause the reflected light to be deflected at a greater angle.
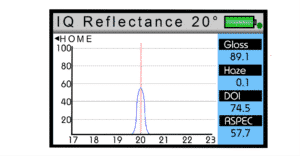
The Rhopoint IQ is different to a gloss meter as it uses a linear diode array (LDA) at 20° to measure the distribution of reflected light between 12.75° – 27.25°.
Conventional glossmeter optics are used at 60° & 85° and these fully comply with international gloss standards such as ISO 2813 and ASTM 523.
The instrument does not have physical receiver apertures like a conventional gloss meter; the 20° gloss value is obtained by measuring with the elements of the linear array that correspond to the angles specified in the standards.
This feature allows the instrument to quantify the effects of texture on a surface that can be classified as either orange peel or haze according to their size.
Haze is light that has been reflected by very small surface structures adjacent to the main specular angle. The term “Haze” defines the milky halo or bloom observed visually on high gloss surfaces.
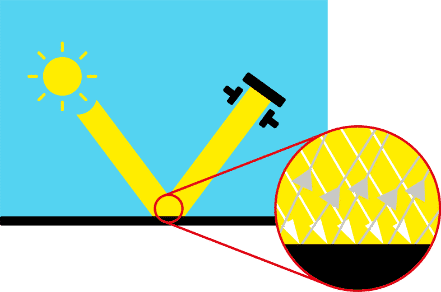
Surface haze can be problematic in most coating applications including automotive manufacture, powder coatings and other high gloss coatings. It can be attributed to a number of causes including incompatible materials in a formulation, poor dispersion and problems encountered during drying/curing/stoving.
Coatings without haze can be seen to have a deep reflection and have high reflective contrast. Those with haze exhibit a slight “milky” finish which can be seen over the highly glossy surface.
Haze is caused by microscopic surface texture which diffuses light adjacent to the main component of the reflected light.


When viewing the reflection of a strong light source in a surface with high haze, the image “blooms” and has a bright halo around it.


Haze is an important measure for highly polished metals and is often associated with polishing marks and machining direction.
Using the LDA technology in the Rhopoint IQ, measurement of Haze is easily achieved, using the procedure described in ASTM E430, by analysing the amount of light that has been deflected +/-2° either side of the specular angle.
Haze compensation is also included to allow haze measurement on different coloured surfaces, the light diffusion caused by bright colours e.g. white, yellow would otherwise produce higher levels of haze even though they are the same.
This measurement is performed automatically by the instrument in one process.
Distinctness of Image is, as the name implies a function of the sharpness of a reflected image in a coating surface.
Two surfaces finished with similar coatings may exhibit identical gloss values but visually the quality of one coating can be seen to be very poor. Upon closer inspection the visually substandard poor coating has a highly textured dimpled appearance known as “orange peel”. When a reflected object is viewed in such a coating the image becomes fuzzy and distorted.
Orange peel, waviness, texturing, pin holing and similar effects can be problematic in many high gloss coating applications including automotive, powder coating and any other industries that requires a smooth homogenous finish. All these effects can be measured with the Rhopoint IQ.
DOI has been measured instrumentally and subjectively in the automotive industry for many years. Instruments that measured this value in the past were bulky expensive and some had poor repeatability. DOI measurement was not common outside of automotive because of the cost of equipment was high and the demand for high quality gloss finish was not as crucial.

The Rhopoint IQ measures the DOI of a surface by quantifying the way a reflected measurement beam is spread and distorted around the specular angle.
Example test panels with low and high DOI values. Orange peel, texture, flow out and other key parameters can be assessed in coating applications where high gloss quality is becoming increasingly important.
The DOI value of a surface is a number between zero and one hundred; a surface that exhibits a perfect undistorted image returns a value of 100, as texture increases the image becomes distorted and the DOI value decreases.
Distinctness of Image (DOI) was one of the first parameters to define surface texture, it was originally a visual and instrumental measurement.
Distinctness of image is, as the name implies a function of the sharpness of a reflected image in a coating surface. As more orange peel becomes visible on a surface the distinctness of the reflected image becomes lower.
This effect is measured instrumentally by quantifying the way that light is reflected around the specular angle, a perfectly smooth surface with sharp reflection has a DOI of 100, decreasing with the amount of orange peel present.
Whilst the DOI parameter was suitable for the fineness of finish available around the time of its development, the quality of today’s coatings has increased to a point where DOI is a much less relevant measurement in many industries.
Reflected Image Quality is a new measurement developed by Rhopoint Instruments to provide greater sensitivity when evaluating highly reflective coatings and the specular / diffuse element of lower gloss materials.
Two highly reflective surfaces that have very small changes in orange peel or texture will show very little or no change in DOI due to the way that it is calculated, but will appear quite different visually.
By reducing the sensing distance around the specular angle and measuring the reflected light and distortion around it, a much higher resolution response is achieved with greater linearity, more in line with the visual experience.

Two highly reflective panels with the same gloss values show little change in DOI but appear different. However, when using RIQ a greater differentiation is achieved.

The RIQ value of a surface is also a number between zero and one hundred; a surface that exhibits a perfect undistorted image returns a value of 100, as the values decrease higher surface texture is present and the image sharpness reduced.

DOI (Distinctness of Image) is not sensitive to low amounts of orange peel on the highest quality surfaces.
RIQ (Reflected Image Quality) has more proportionate response to orange peel on a wider range of surface finishes.
RIQ works well in differentiating low gloss surfaces with different specular/diffuse components.
RIQ measurement is sensitive enough to quantify appearance differences due to-
Gloss, Haze, DOI and RIQ values are all produced simultaneously in one fast measurement using the Rhopoint IQ.
20° gloss & haze meters have fixed geometry. They require very flat surfaces to measure accurately.
The Rhopoint IQ uses a 512 element sensor that measures 20 +/- 7.25°. It mathematically determines the gloss angle.

With a standard gloss meter non-flat surfaces cause light to reflect on an incorrect part of the sensor and give inaccurate gloss results. With the Rhopoint IQ light is reflected on different areas of the diode array, and the instrument automatically compensates for the surface irregularities.

On the left: Two similar appearance surfaces, one is curved- the reflected light falls away from the centre of the array.
The reading on the right showing the IQ automatically compensating for non-flatness.
Law of Reflection: The direction of incoming light and the direction of outgoing light reflected make the same angle with respect to the surface.
RSpec is the peak reflectance measured over a very narrow angular band in the specular direction (+/-) 0.0991º.
RSpec is very sensitive to any texture that is present on a surface. This texture or waviness acts as a concave or convex reflector that deflects light around the specular angle. When RSpec is equal to the gloss value the surface is smooth, as texture increases the RSpec value decreases.

The diagram above shows the same coating applied to two panels, the first has orange peel/waviness present due to the incorrect application setting on the spray gun.


| Rhopoint Products | 20º Gloss | 45º Gloss | 60º Gloss | 85º Gloss | Haze (Reflectance) | Orange Peel | RSpec | Flat surface | Curved surface | Surfaces with curvature |
|---|---|---|---|---|---|---|---|---|---|---|
| Novo-Gloss 60 Glossmeter | ✓ | ✓ | ||||||||
| Novo-Gloss Trio 20/60/85 Glossmeter | ✓ | ✓ | ✓ | ✓ | ||||||
| Novo-Gloss 20/60/85 Glossmeter with Haze to ASTM E430 | ✓ | ✓ | ✓ | ✓ | ✓ | |||||
| Rhopoint IQ 20/60 Gloss Haze DOI Meter | ✓ | ✓ | ✓ | ✓ | ✓ | ✓ | ✓ | |||
| Rhopoint IQ 20/60/85 Gloss Haze DOI Meter | ✓ | ✓ | ✓ | ✓ | ✓ | ✓ | ✓ | ✓ | ||
| New Rhopoint TAMS | ✓ | ✓ | ✓ | |||||||
| Optimap3 | ✓ | ✓ | ✓ | |||||||
| Concrete Clarity Meter (CCM) | ✓ | ✓ | ✓ | ✓ | ✓ | ✓ | ||||
| Novo-Curve Glossmeter | ✓ | ✓ | ✓ | ✓ | ||||||
| Novo-Gloss Flex 60 Glossmeter | ✓ | ✓ | ✓ | ✓ | ||||||
| Novo-Gloss 45 Glossmeter | ✓ | ✓ |
