Taking a Measurement (Cross-cut)
How to measure Cross-cut Adhesion
The measurement button is used to start single or multiple measurement that are sent directly to the table.
Ensure the sensor is calibrated.
To access the multiple readings feature, right click on the measurement button.
Press the measurement button to start.

How to measure surface texture using the interactive measurement feature
The interactive measurement function is a "live" view of the sample surface.
The surface camera is used to correctly align the cross-cut area before measurement.
Activate Interactive Measurement
Press the interactive measurement button.

Optimize Camera Exposure
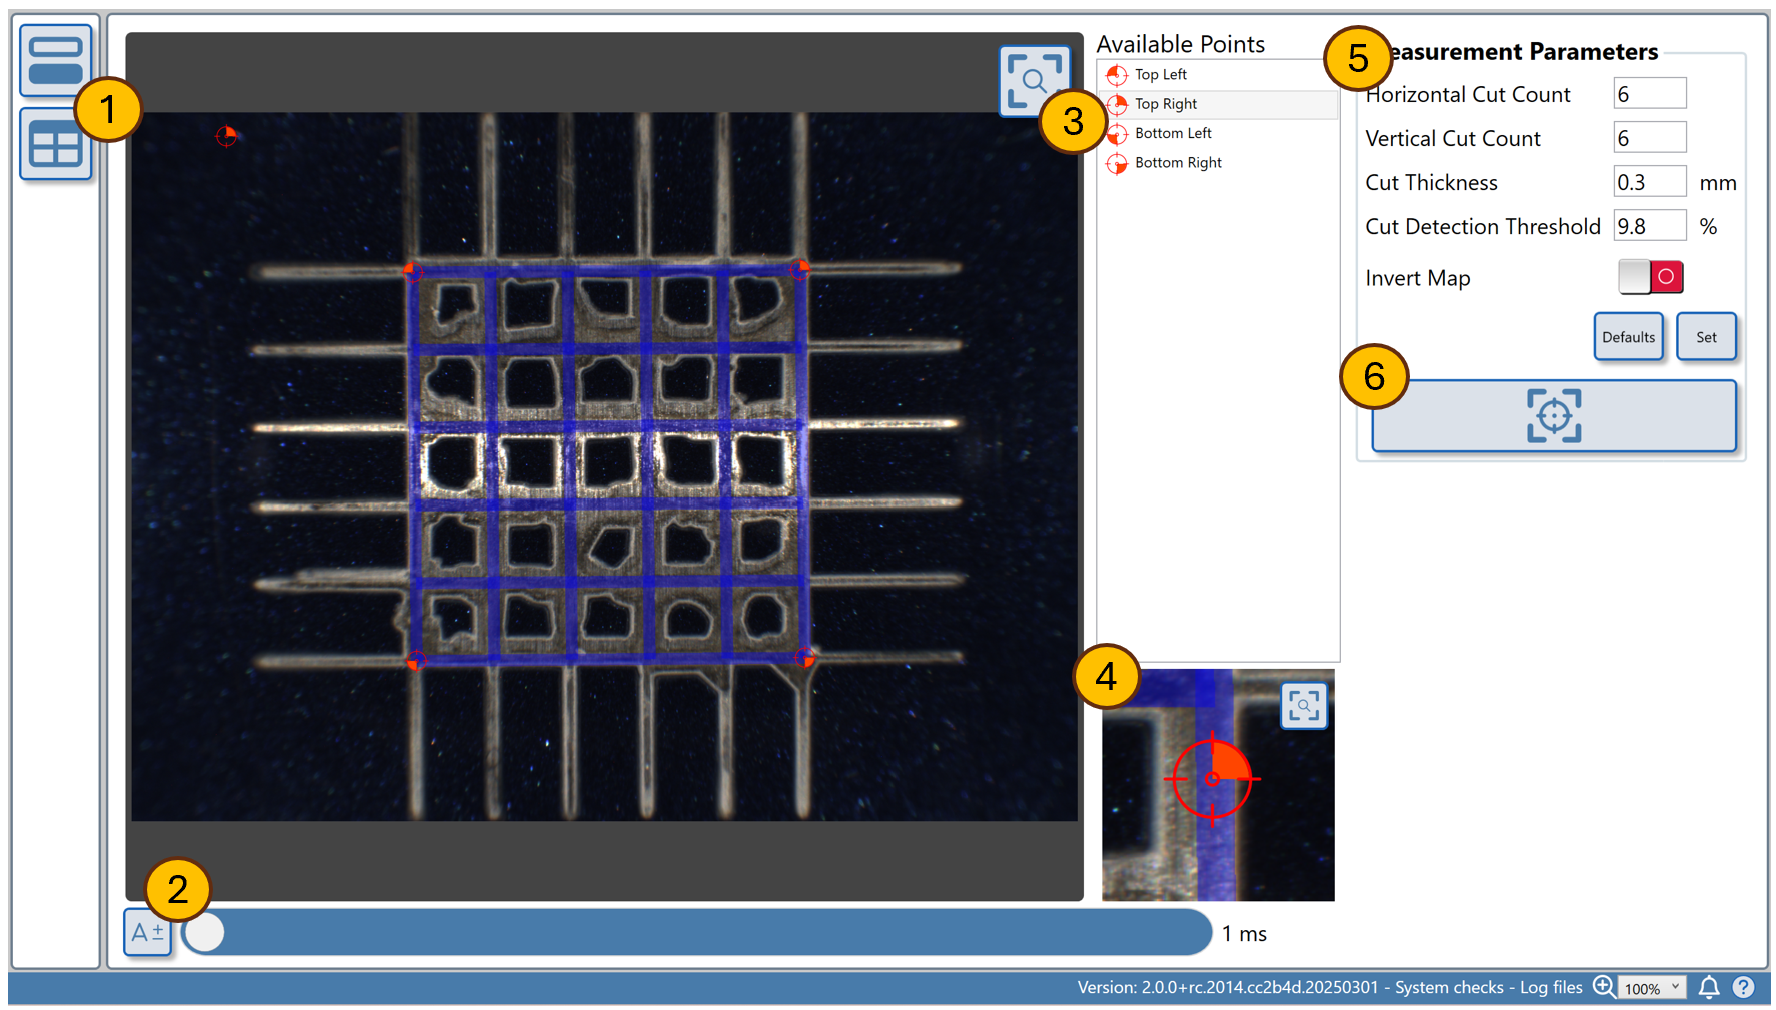
Use the Auto-Exposure button to optimize the camera exposure for the surface's reflectivity.
If necessary, manually adjust the exposure using the slider or input box (2).
Select Cross-Cut Corners
In the analysis window (1), click on the four corners of the cross-cut area to be evaluated.
Placement order: Top Left, Top Right, Bottom Left, Bottom Right.
Use the zoom feature (4) if needed to ensure precision. The cross-hair should be placed at the center of each intersection between horizontal and vertical cuts.
To adjust a selection, click on one of the available points (3).
Set Grid Parameters
Select the number of cuts in the square (5).
Press the SET button to draw a grid on the surface.
Check Line Thickness
Verify that the thickness of the drawn lines matches the thickness of the cuts on the surface. Adjust if necessary using control (5).

Preview Measurement
Press the Preview Measurement button (6).

Review Analysis Results
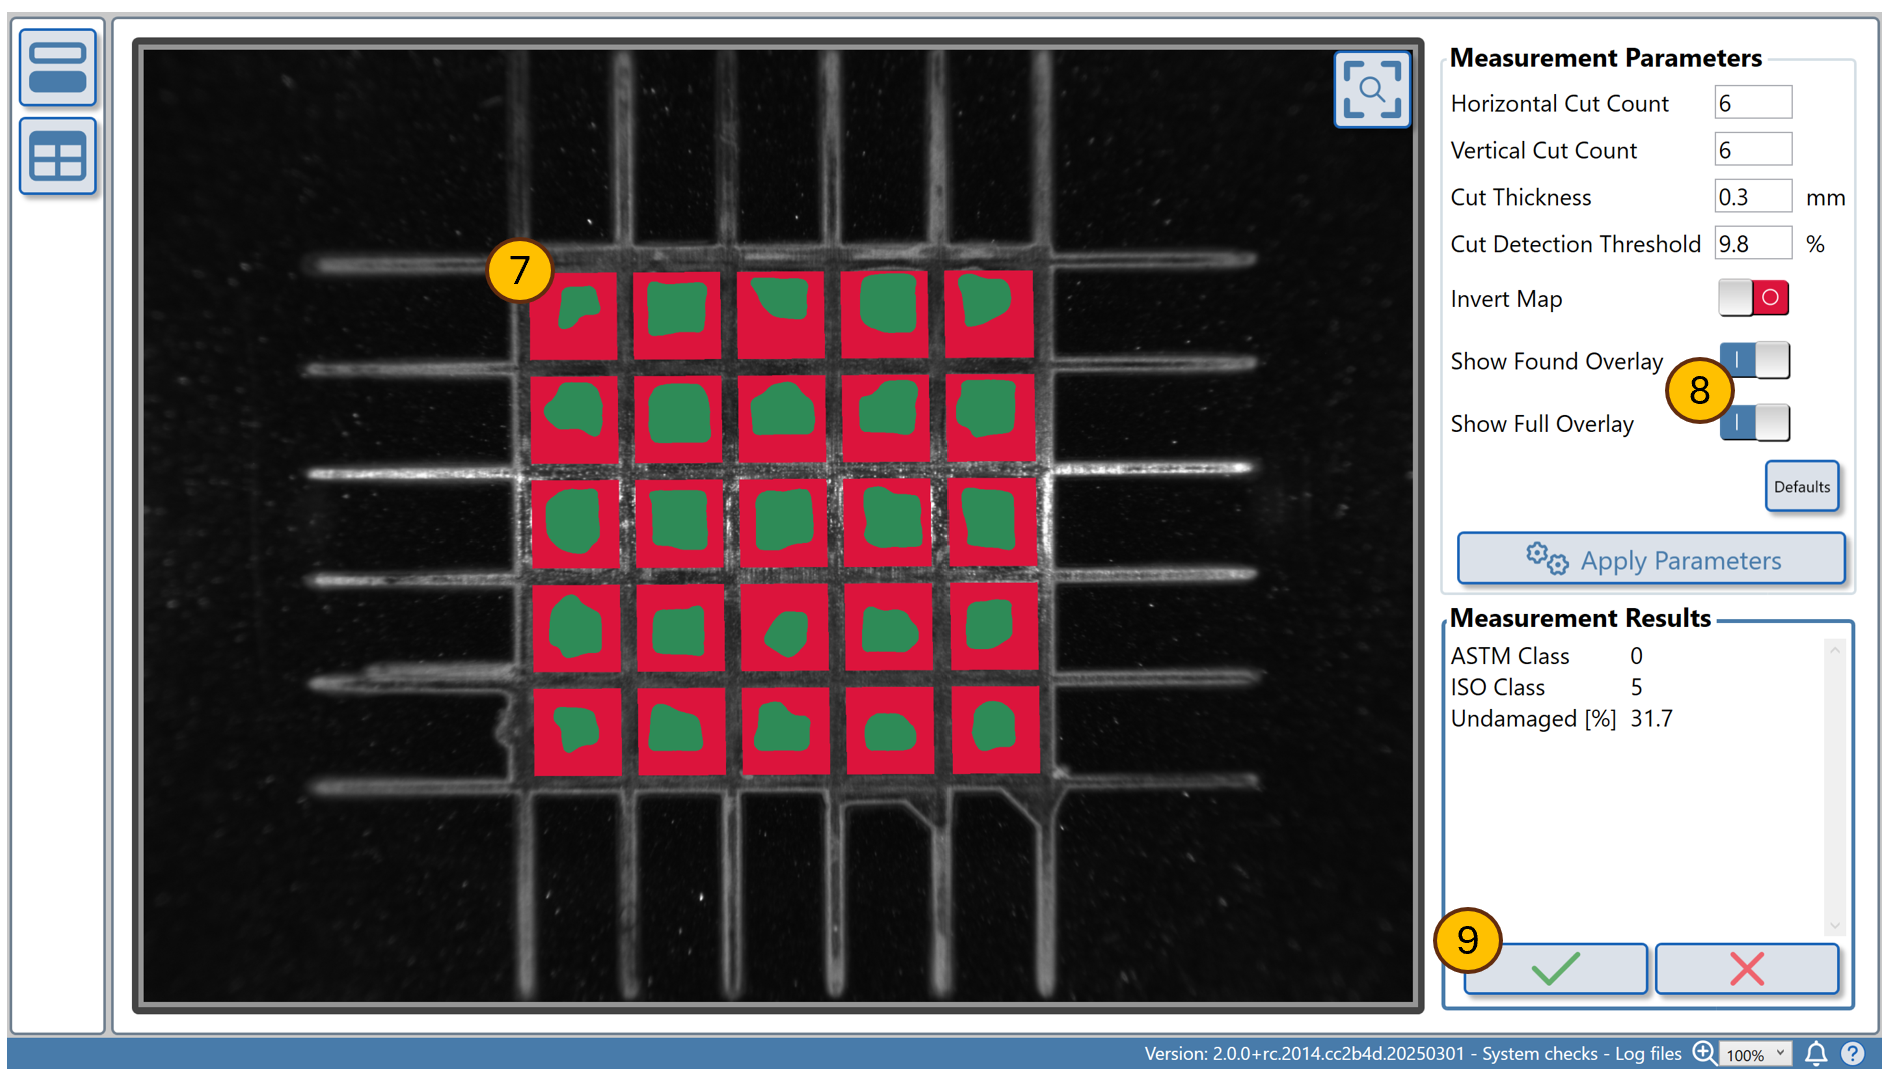
Visually compare the analysis result with the image by toggling on/off the analysis overlays (8).
Adjust Parameters if Necessary
If cuts are darker than the paint color:
Select "Invert Image" and press (6) to apply parameters.
If cut areas are mistakenly identified:
Reduce the cut detection threshold.
If areas of paint are not correctly identified:
Increase the cut detection threshold.
Reprocess Analysis
Once adjustments are made, press the Apply Parameters button (6) to reprocess the analysis.
Save or Restart Measurement
When satisfied with the analysis, press the "Tick" button (7) to save the measurement in the results table.
To restart and redo the interactive measurement process, press the "Cross" button.