Taking a Measurement (Polishing Quality)
How to measure Polishing Quality
The measurement button is used to start single or multiple measurement that are sent directly to the table.
Ensure the sensor is calibrated.
To access the multiple readings feature, right click on the measurement button.
Press the measurement button to start.

How to measure polishing quality using the interactive measurement feature
The interactive measurement function is a "live" view of the sample surface.
The surface camera is used to identify particular areas of interest on the surface before starting a measurement.
Measurement Procedure
Ensure the sensor is calibrated.
Press the button to activate the interactive measurement feature.


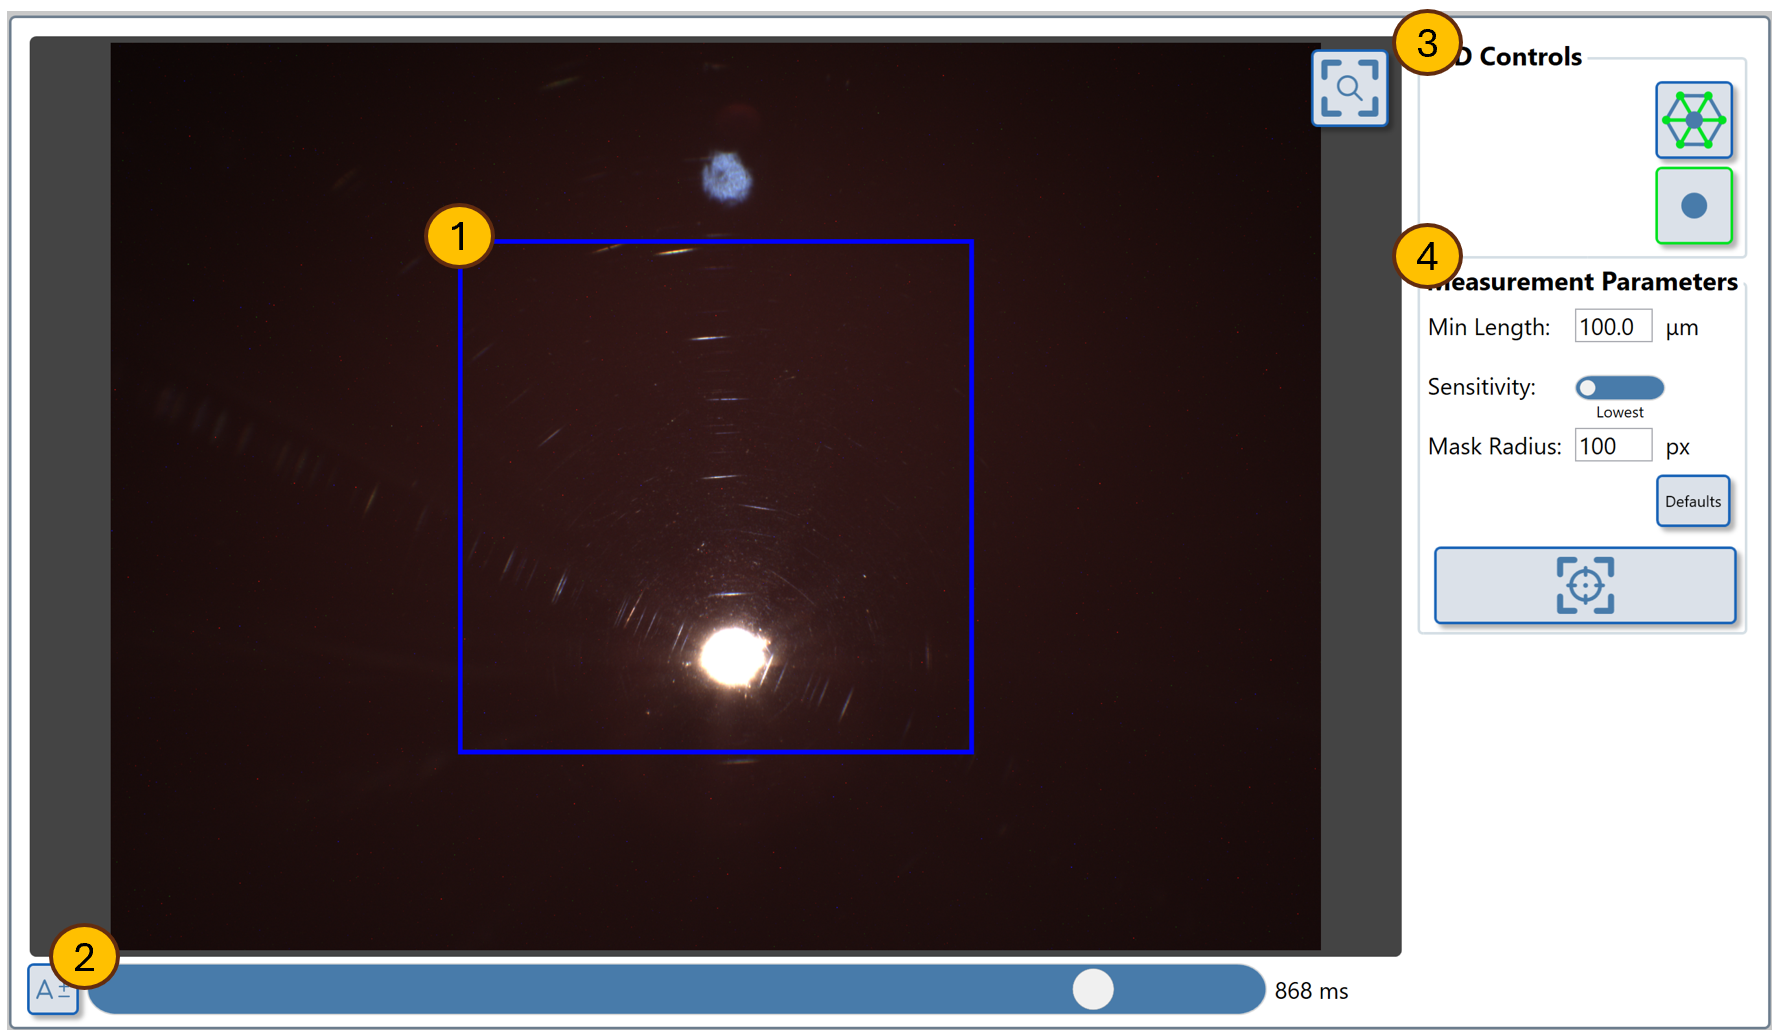
Use the auto-exposure button to optimize the camera exposure for the surface's reflectivity.
Manually adjust exposure if needed using the slider or input box.
The blue square (1) indicates the measurement area for this module.
To measure the texture of an identified area on the surface move the sensor until the required area is enclosed by the blue square (1).
Press the measurement button (4) to take a preview measurement.

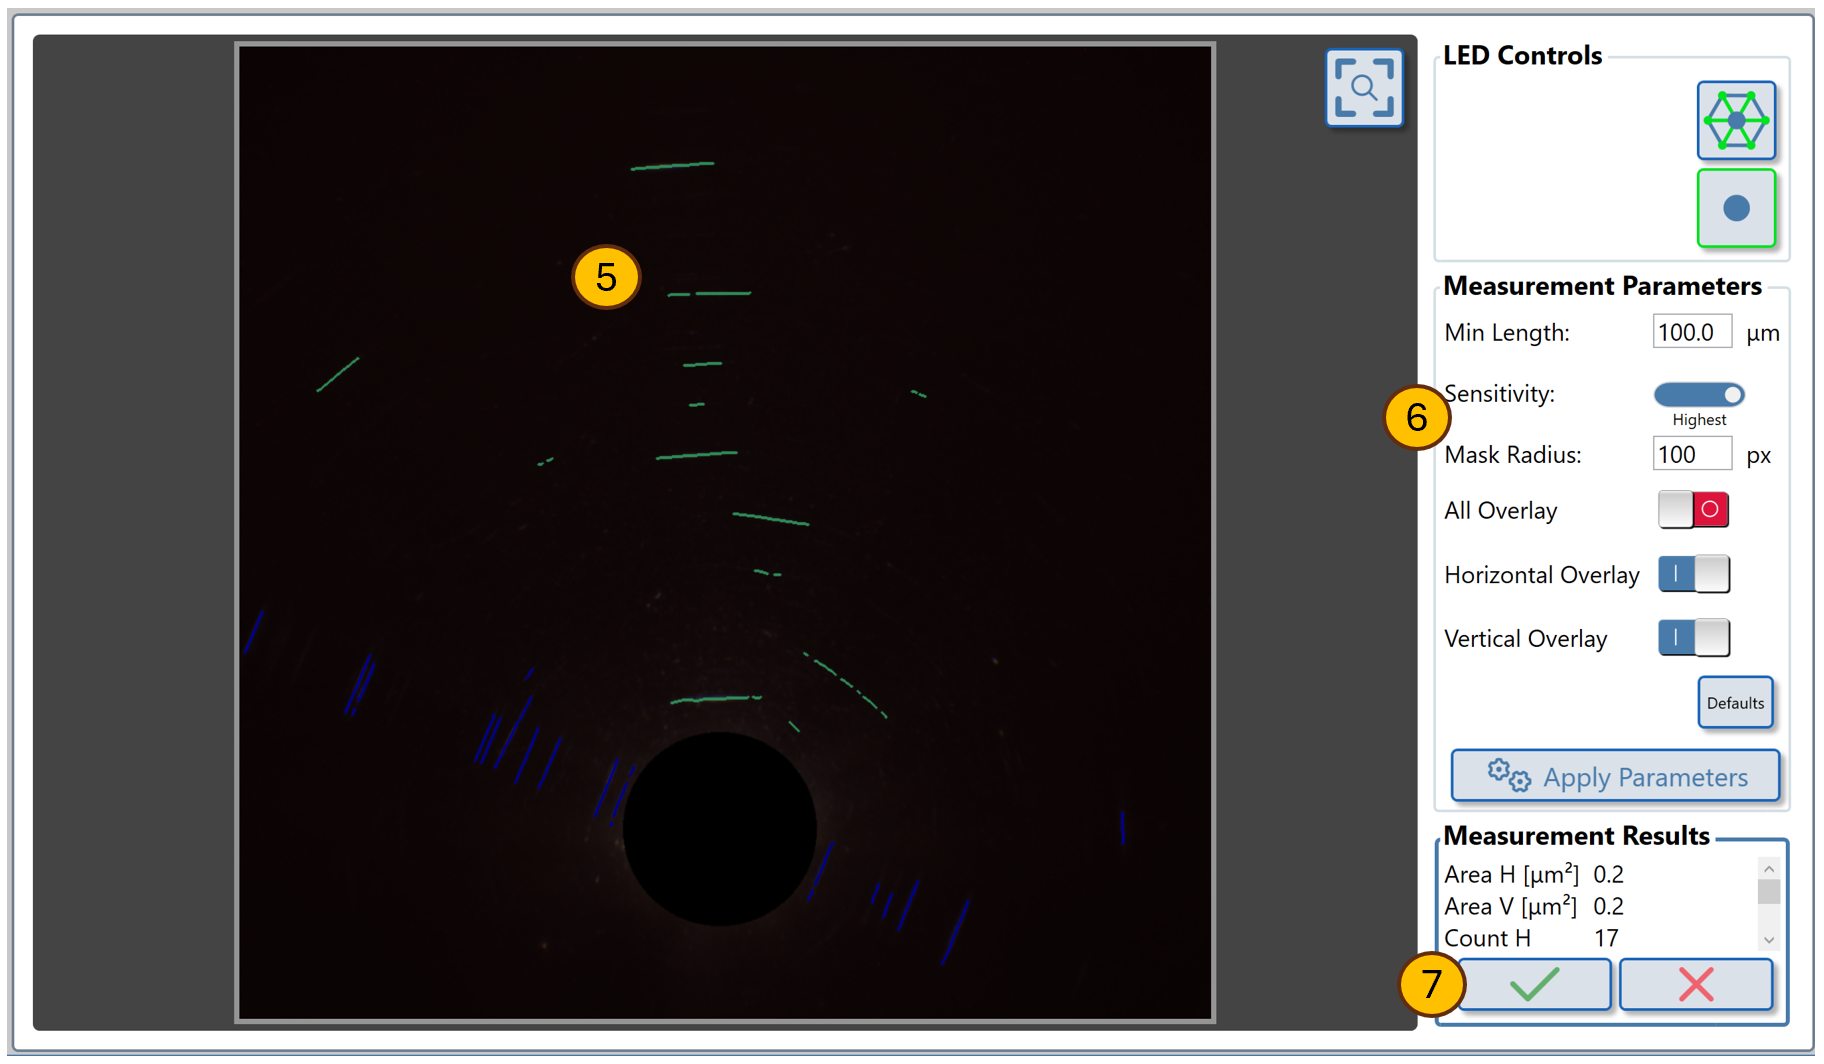
The feature map (5) displays the identified elements.
The measurement parameters can be adjusted to change the profile of identified features. Read More.
Once measurement parameters are adjusted press Apply Parameters button (6) to reprocess the analysis.
When the analysis is acceptable, press the "tick" button (7) to save the measurement in the data table.
Pressing the cross will restart the interactive measurement process.